I have two gardens in my house, one at the front and one at the back. This one is about the front garden and how I applied Japanese garden design principles from the book Niwaki: Pruning, Training and Shaping Trees the Japanese Way.
My gardens
Both of my gardens are very small by any standards. The front garden being twenty five square metres and the rear being around thirty. I’ve always had an interest in gardens because I spent nearly a lot of time in my grandparents garden from a baby all the way through to adulthood. Here I am in some of my more formative years in said garden. I also have, and have always had, a thing for hammers.

I was very lucky to grow up in a house with a large garden (comparative to where I live now) and I spent a lot of time in it. In the borders, up the trees and in all the bits that you “find” when you inevitably get paid £2 to go and remove weeds from the back of the shed.
I cannot remember when my fascination with Japanese gardens started, but it ramped up a level when I was studying design in the early 2000’s. Whilst my grandparents garden was a true spectacle of flowers and ponds, it was very much a place where every square inch was filled with something. There was not a lot of “white space”, whereas in a Japanese style garden space is used to give the elements room to speak, breathe and just be.
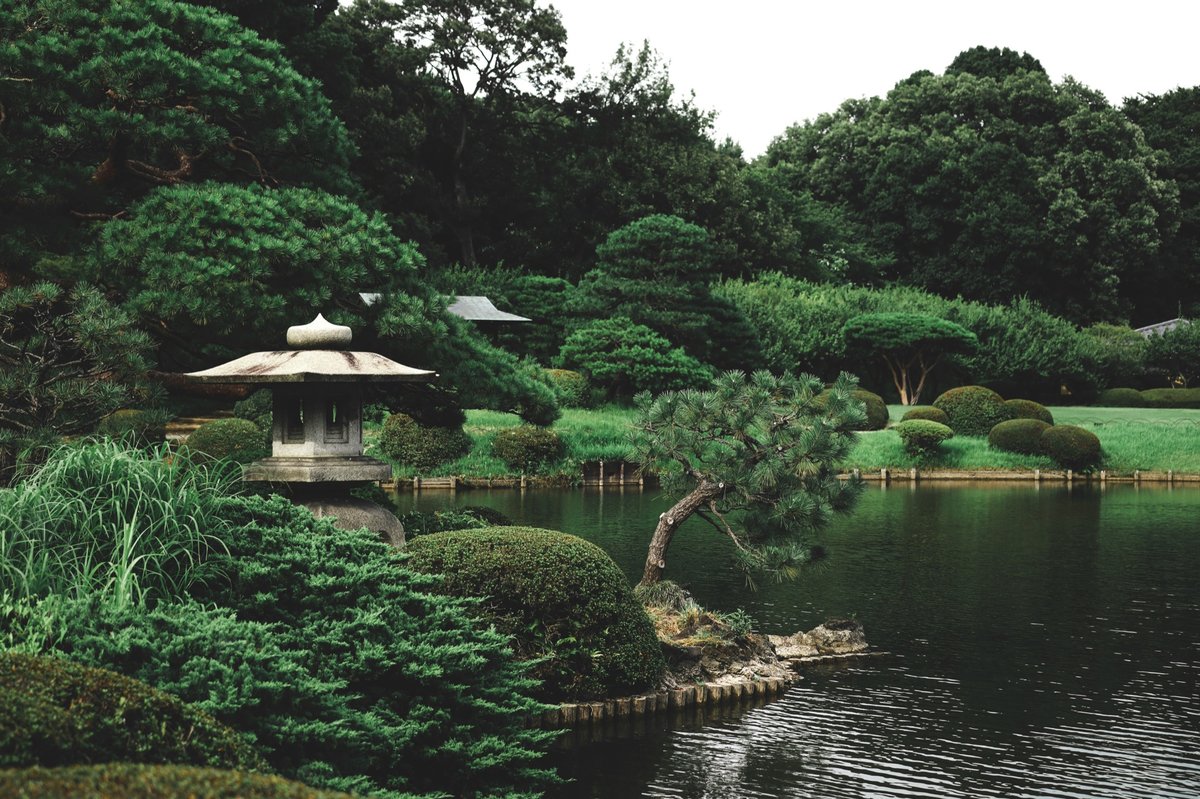
Photo by Thor Alvis on Unsplash
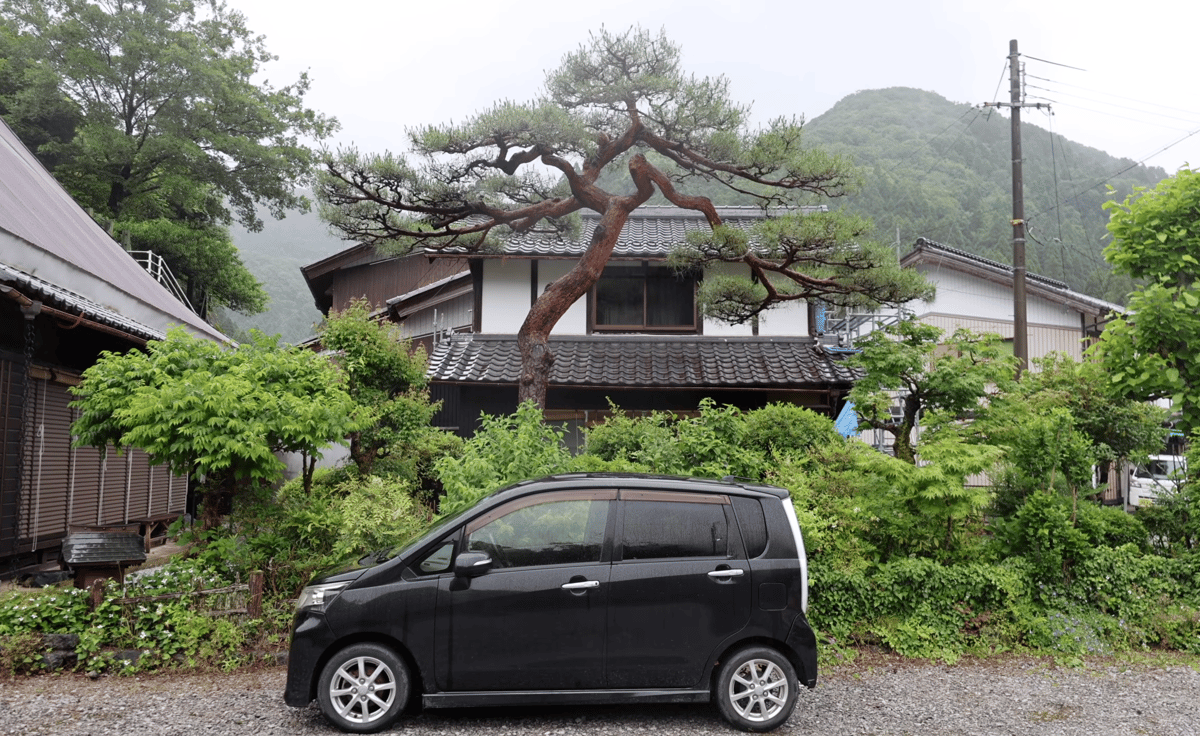
Of course for me it’s about the trees. Niwaki has a strong relationship to bonsai, particularly in form. Heres’ a shot of a Scots pine (I think, because of the colour of the trunk) from a one of Scott Browns videos where he was renovating a house in Japan. That tree didn’t grow into that shape, it was a conversation between whoever cared for it and the tree itself. Now it’s glorius.
But niwaki isn’t always about the form of the tree, it’s also in how they are pruned. You can see this style all over the world. Here’s a great example of “pruning pads”, which is another common trait in niwaki. The key point here is that it’s in from the palace in Corfu, Greece.

Of course, I am not in Japan. I am in a small industrial town on the outskirts of Northumberland and I live in a “new build” estate where despite having a lovely community of neighbours, we are all pretty squashed in together. Hence my small gardens. This doesn’t preclude me from taking some of the principles of Japanese garden design and applying them to my life. Far from it, constraints foster creativity.
The fence
We moved into our house in 2008 and until 2018 it looked like this. There’s the remnants of my first tree removal in this photo1.
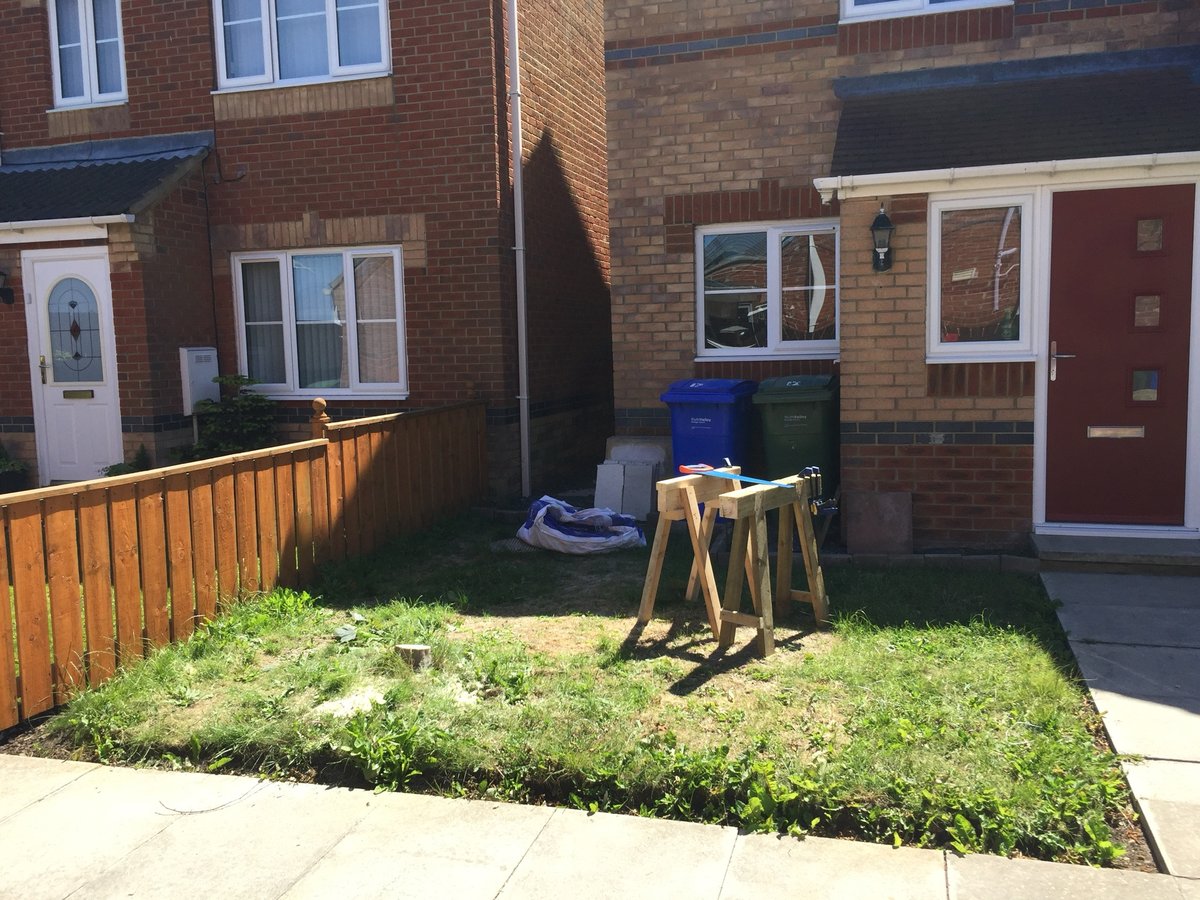
I was never into the fence. A neighbour with boundary issues decided to erect it in early 2018. I’m grateful for it though because without it, I’d never have designed and implemented the raised bed design to hide it in mid-2018. At the time I was just as petulant as the neighbour in question2.
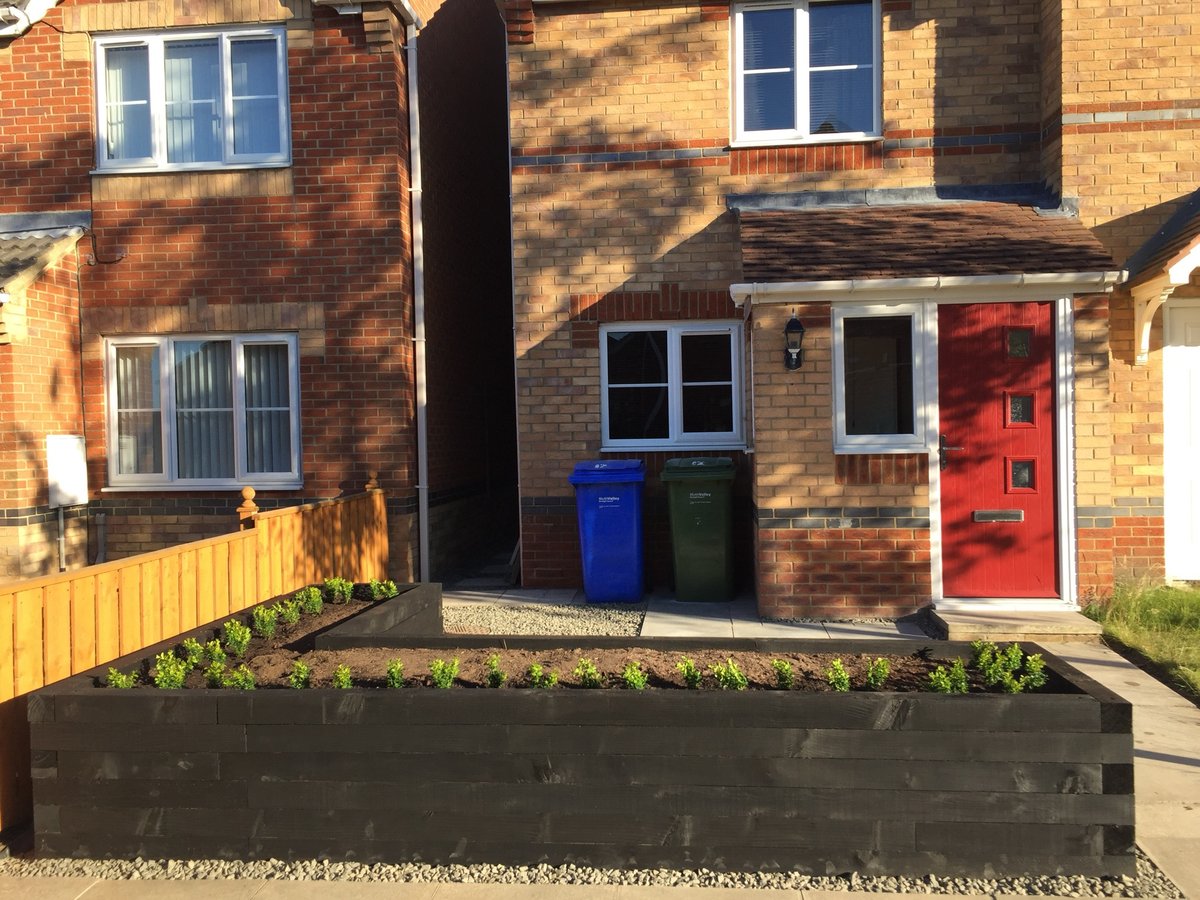
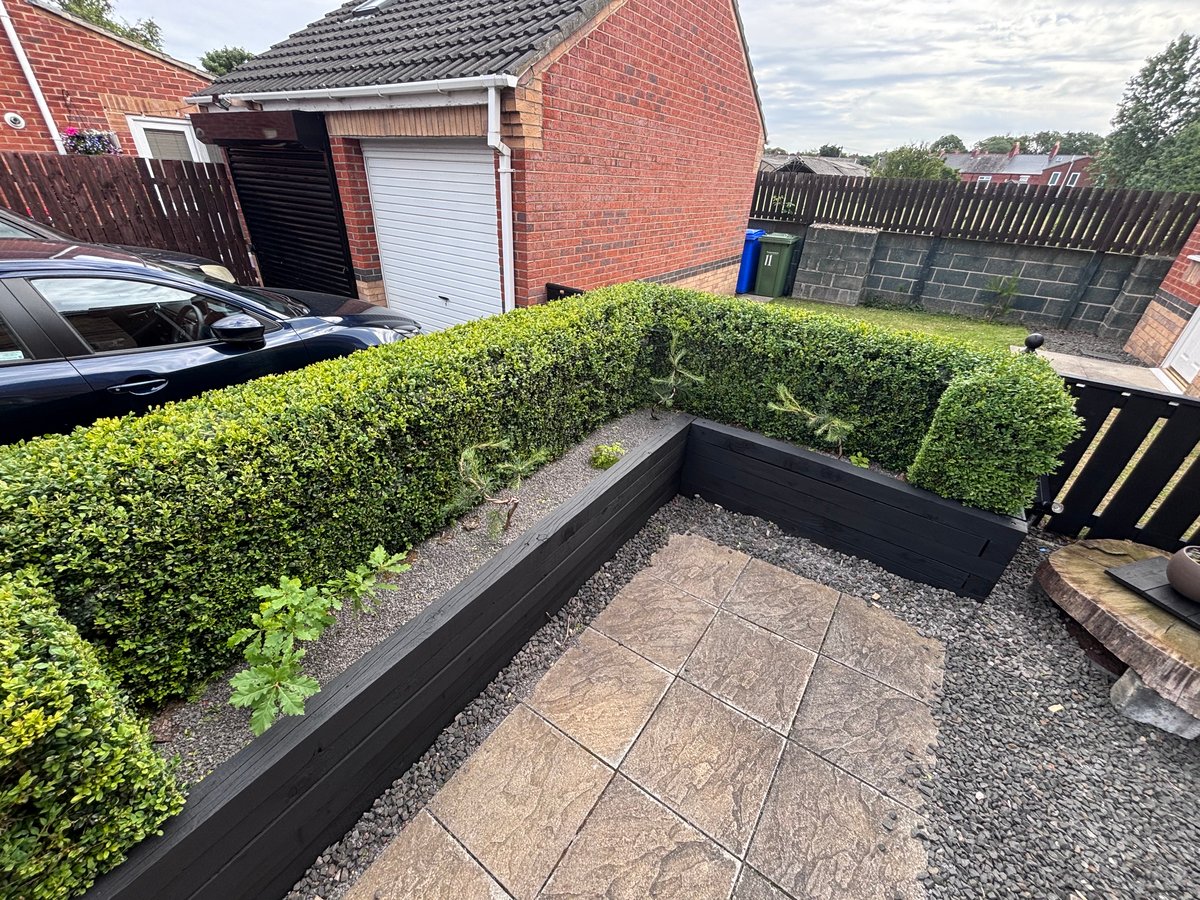
That was 2018 and now eight years later, that’s a mature (and nicely shaped) box (Buxus sempervirons) hedge.

Elements
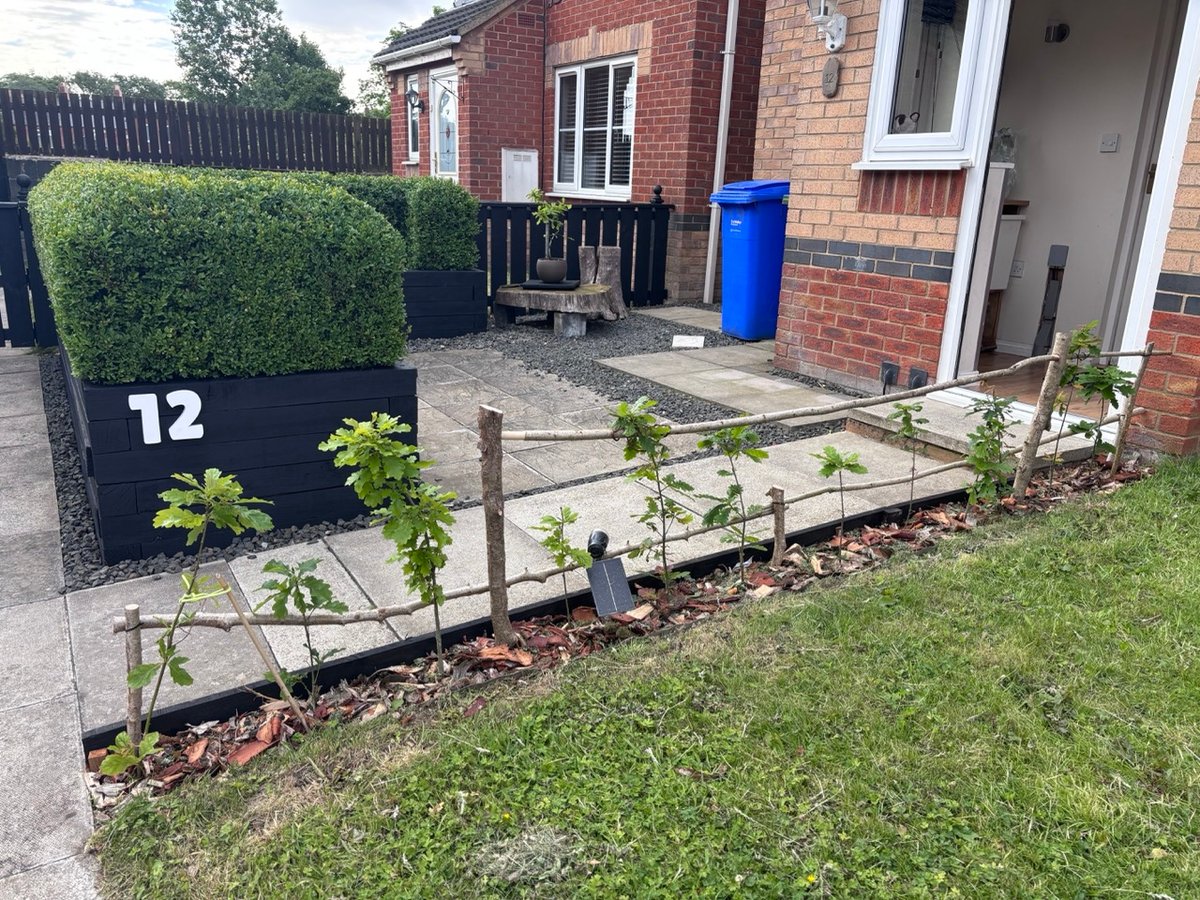
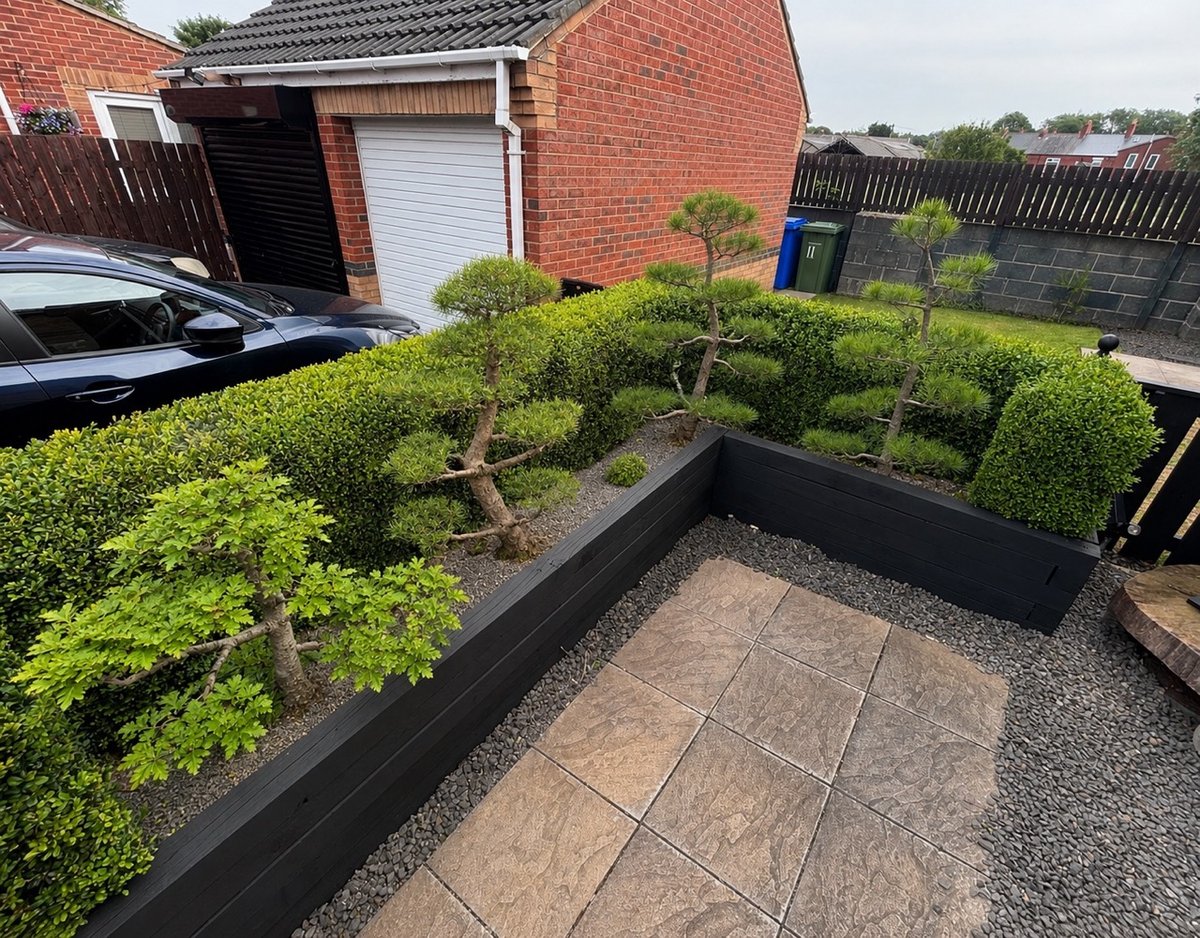
There’s three main elements to the front of our house. The raised bed with the hedge, the newly planted oak hedge and the space leading to the back. I’m not counting the bins, although they do add a degree of wabi-sabi to the affair.
Here’s all three in one shot:
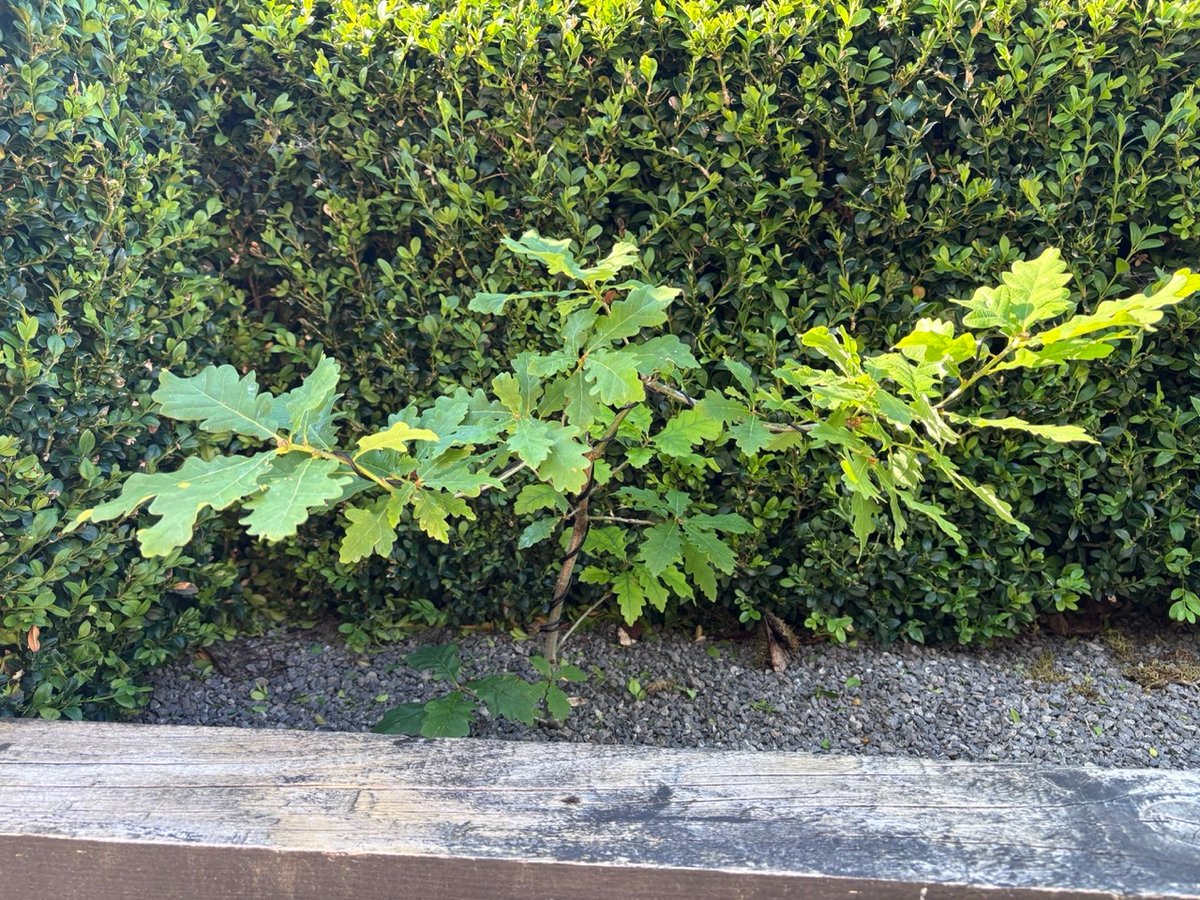
Oak hedge
The oak (Quercus robur) hedge was planted in 2025 and it won’t really fill out until around 2030. The hazel training fence serves two purposes. The first is practical, it gives me something to train the hedge to and secondly, it stops (most) delivery drivers from walking through the hedge and knocking off fresh growth.
Oak isn’t typically used as a hedge species but it has the same characteristics of a beech hedge in that it is a marcescencent species. Remember that I’m not attempting to recreate a pastiché Japanese garden, I’m applying the principles here. So using oak, which is a native species to England is perfectly fitting. It’s immature right now so there’s no form to it, but make no mistake: this hedge is niwaki in sense of it being in the ground and how it will be shaped. In late spring the hedge will be vibrant green with new growth, in summer a deep green, in autumn a golden red and in winter a brown. Underneath it all a uniform scaffold of pleached branches.
It’ll juxtapose the box hedge really well. Deciduous vs evergreen. Eventually. Because these things take time.
The space at the back
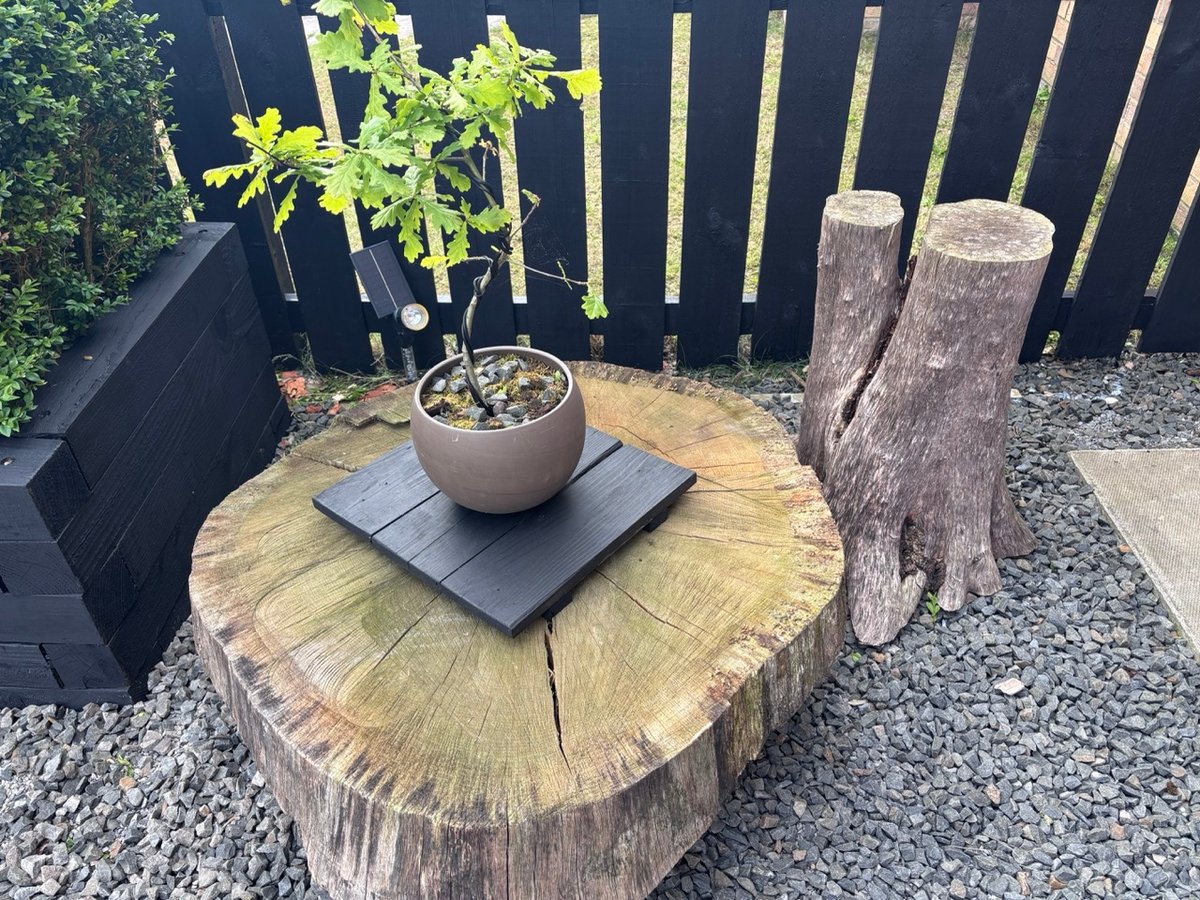
I’ve recently been getting into the bonsai which is as much plant science as it is art and expression. I’m also a bit of a hoarder of interesting parts of trees from all of the various tree work I do. Here’s where these two aspects of me collide.
To fill this space I’ve got a bit of a narrative. This is my first real attempt at training a bonsai. It’s an oak (I have a thing for oak in case you cannot tell - it’s my inner druid). It is sitting on a cookie (crosscut slice in chainsaw parlance) of an oak tree that fell during storm arwen in 2020. I was gifted the very large and very heavy log (about 3 tonne, 7 metres long and 1.2 metres wide) from a rather fascinating gentleman who wanted it to go to something other than firewood. Currently, it’s in my woodland where I mill it for timber. I took this slice off the end because the root flare was messing with the milling and I brought it back to the house. Last week I realised it would make the perfect stand for the bonsai.
The stump at the back will become the legs on which this cookie of oak sits. Currently it’s on breeze blocks. The cookie covers a drain and the cats like to sit on it, which is nice.
The niwaki inside the hedge
The final element in the garden is the hedge. Viewing from the street doesn’t reveal anything about the trees inside though. That will change over time as I’ve got five long term trees growing and three short term trees (this area also serves as my “nursery”). The short term trees are all oaks. I tend to collect acorns from my woodland out in rural Northumberland into the soil here and let nature do it’s thing. It’s always surprising when one pops up.
The long term trees are three scot pines (Pinus sylvestris), an oak and a wych elm (Ulmus glabra). The pines were liberated3 from excess stock on when I worked as a forester out in Northumberland, the wych elm was grown from the seed of a now dead and removed parent tree in Ridley Park, blyth. It was the tree on the left.
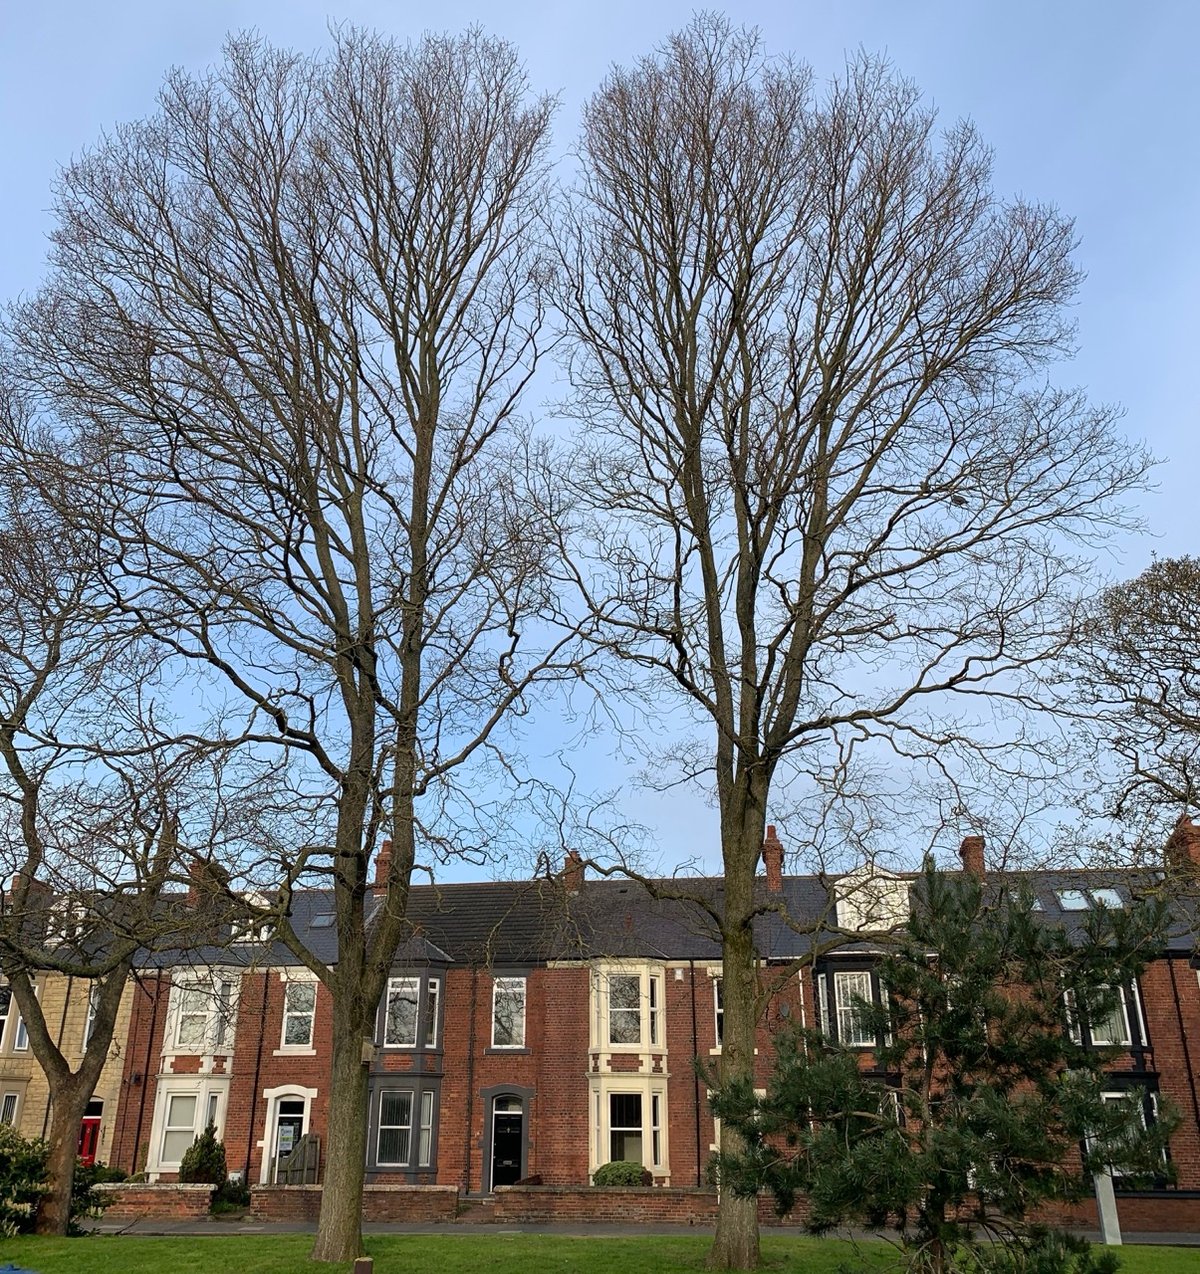
What is interesting about these two elms is how they make one canopy, but that’s a topic for another post. The point is, they’re gone which is sad. Whilst dutch elm disease (Ophiostoma novo-ulm) typically doesn’t affect wych elm’s as much as english elm (Ulmus procera), it will eventually get them. Many all of the wych elms in Blyth are now dead or dying. This is why I moved one of the seedlings into my woodland in remote Northumberland. I digress…
The Oak
All of the longer term trees have been wired for shape, this is especially important for the oaks as they are only flexible for a short period in their life. This tree is three years old and the growth is now at the point where the the wood (xylem) is becoming too stiff to bend. It was this year or never to train some shape into the stem. If I’d left it until next year, I’d have risked tearing up the bark (rhytidome) and the damaging the phloem and inner cambium. Which would be fine if it was a bonsai as I could have used that as part of the aesthetic, but in this case I don’t want to stress the tree or inhibit it’s growth for a good few years.
This tree developed a twin leader, so rather than assert myself over it and remove one, I’m using it as a feature. I’ll train the two leaders out wide and horizontal and train a shoot at the rear to come up and form an upper canopy.
The Pines
I’m very new to shaping trees, especially new trees so I’m quite open to suggestions on how to improve. You can get me on bluesky or Linkedin.
Broadly speaking each tree should have “a front” and the front should invite you in. So what I’ve tried to do in each is to create an interesting shape on which the tree can grow into. As the trunks thicken and the leaders of each tree create height, these curves will soften and become less rigid.
I’ve shaped the three pines as follows.
Pine 1
Here it from two angles to give you an idea of the shape. This one gets the most sun.
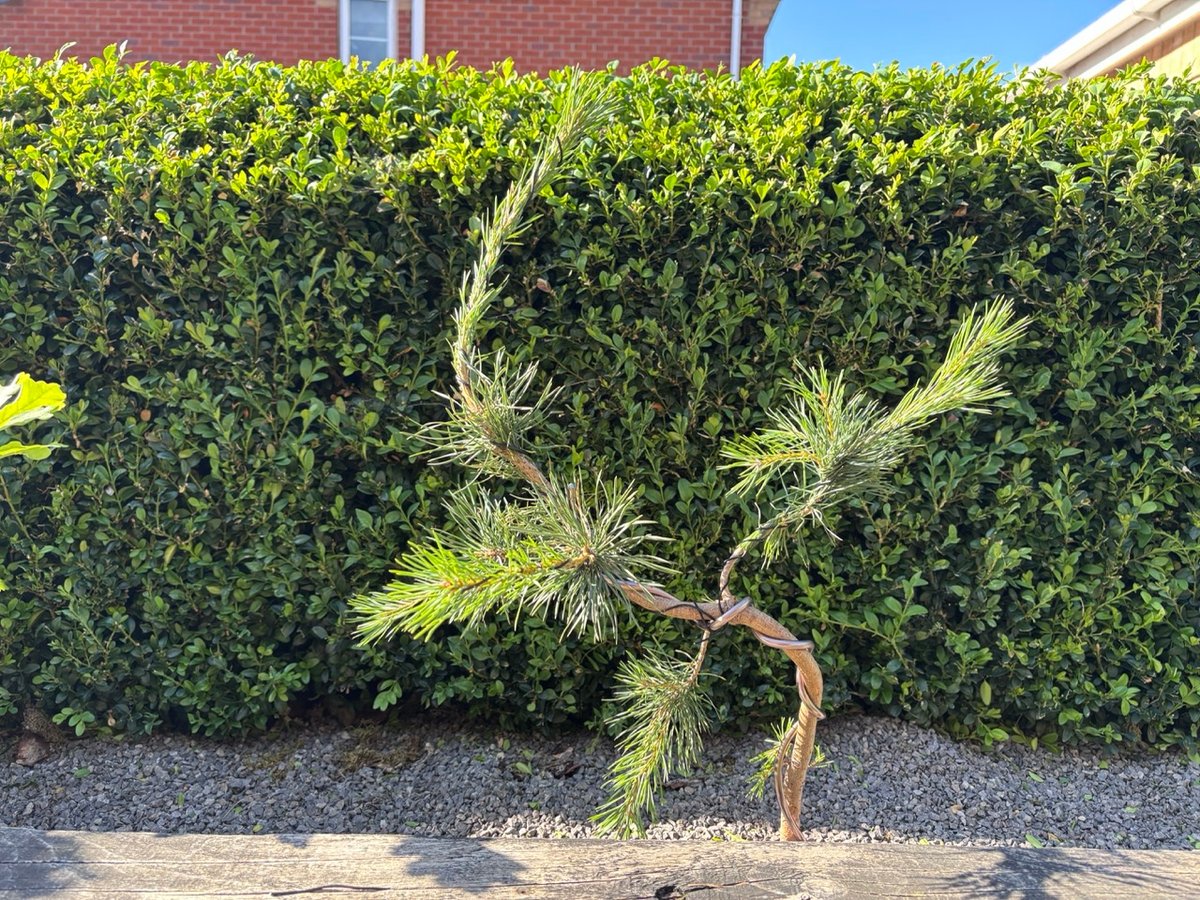
This tree has to yield the oak to it’s left and so it’s heading upwards and to the right.
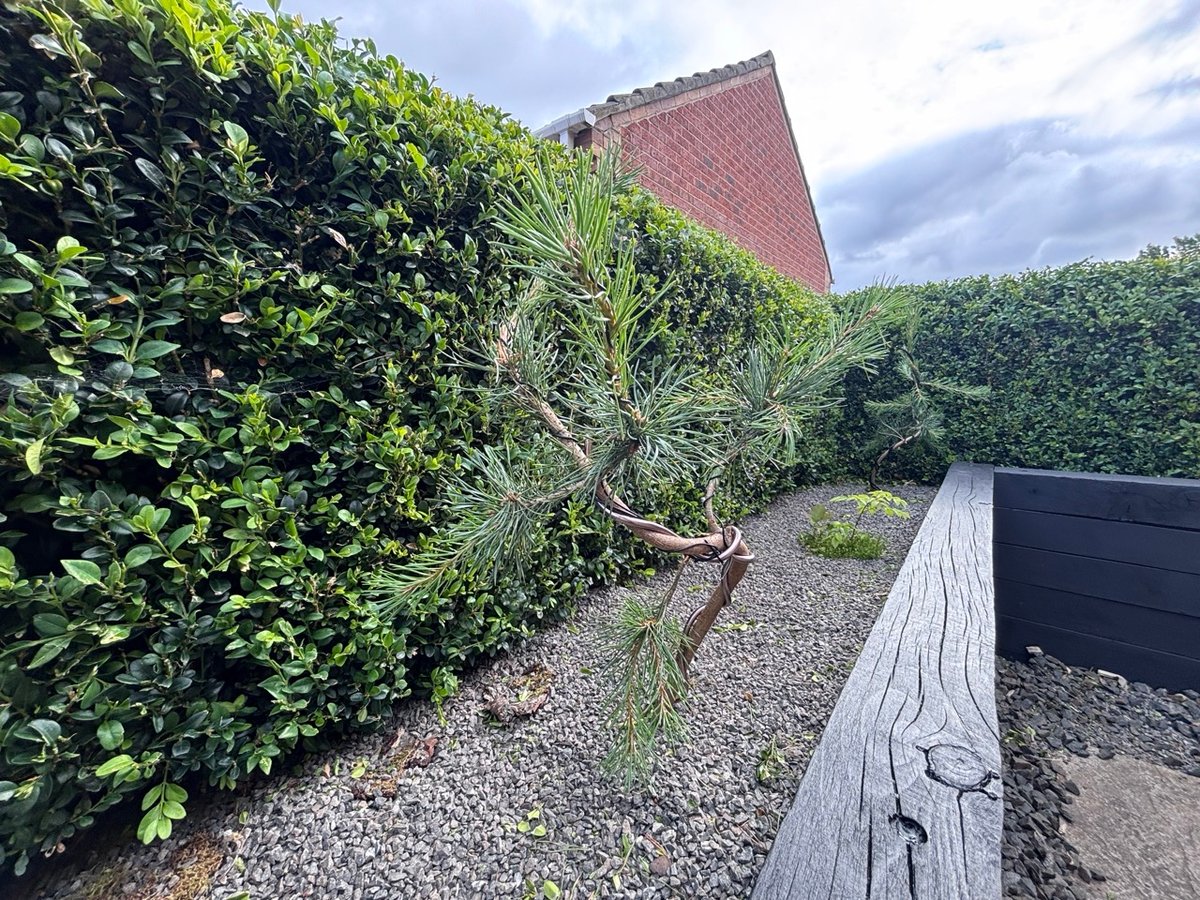
Pine 2
This pine lives in the corner and will be trained to the left. This one gets the sun a little less than pine one, but more than pine three.
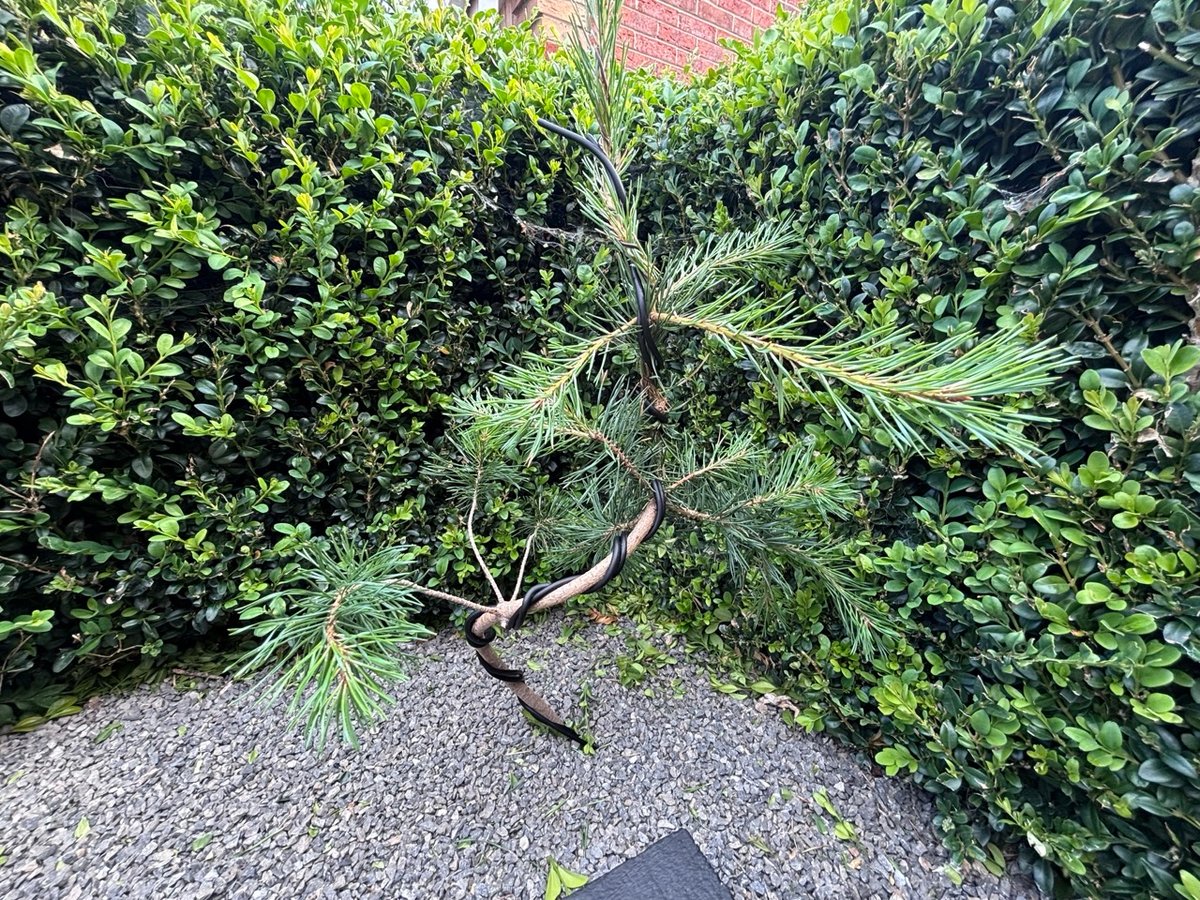
Pine 3
This pine gets the least sun. It needs to grow upwards and towards pine two. The little oak will be moved into it’s first bonsai pot in Autumn.
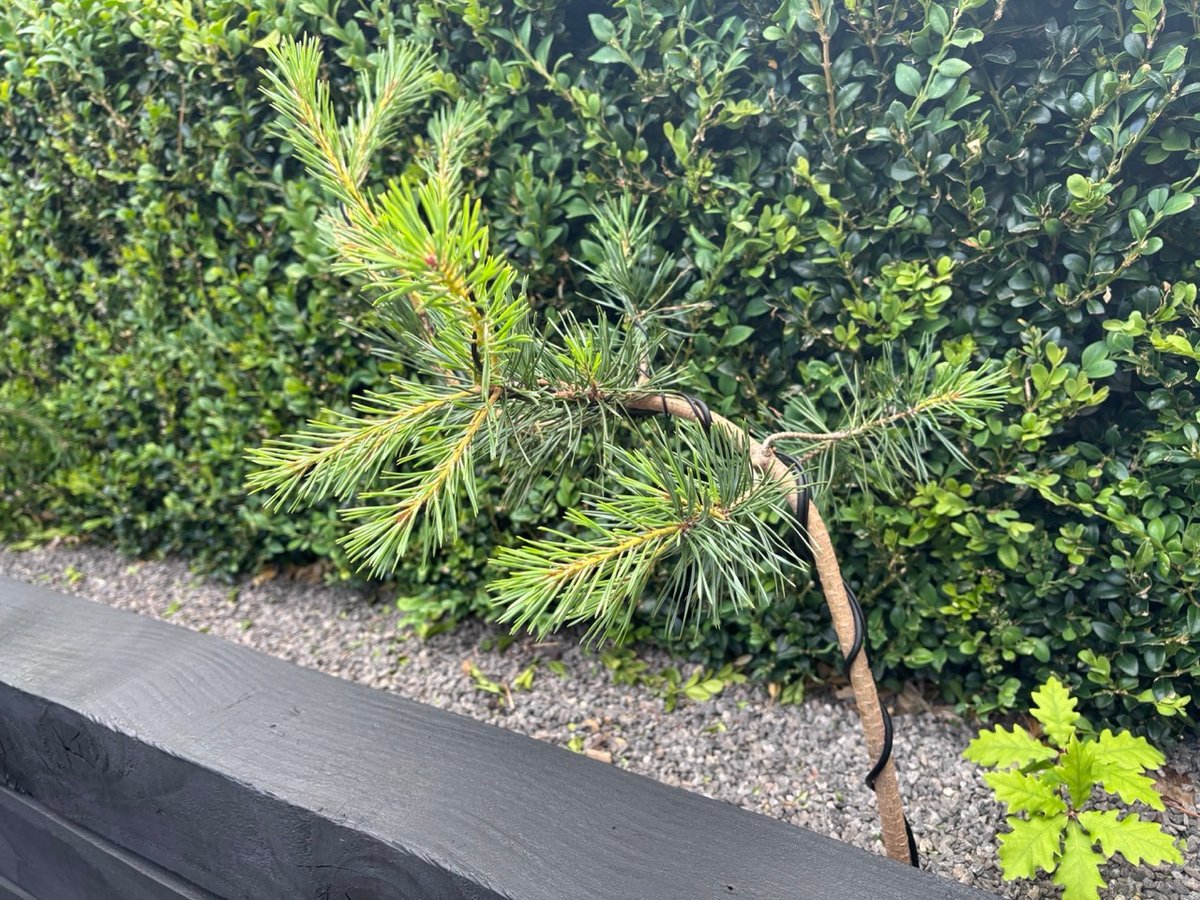
Wire damage
Some damage into the bark and cambium is inevitable when a tree is wired but there is always recovery. I know this from countless trees in the woodland that were once been constricted by honey suckle or ivy that I removed. After a few years the tissue fills out and you hardly notice the damage at all.
However, if left unchecked wires can kill the tree and I want these trees to be long term. If I ever move house, I’m taking them with me and I have no plans to move house any time soon. That’s how long term I’m thinking.
Time
Time is everything and you cannot rush a garden. For me the test is how long I stand there looking at things. My neighbours can attest to the fact that from June - September, I’m out in the garden just staring, zen’d out and appreciating the space. Maybe I spend too long thinking about what it could be, rather than what it is and losing myself in those thoughts. But that’s the thing with trees, they zone me out from time.
By 2036, I hope to have something like this. I wasn’t going to argue the prompting with the AI, so I took the first result it generated. That’s the vibe but with more of an integrated aesthetic; especially on the pine.
Principles
This obviously isn’t a Japanese garden in Northumberland. But it does take from the core inspiration of Japanese garden design. It’s clearly rooted in it’s setting. It is a front garden of a new build house.
The paving stones are municipal and low-end bulk manufactured. But they are there, proudly. The tree species are native and representative of the area. What you cannot see is that behind my house is a large woodland of mixed conifer and broadleaf. My garden is a mini-take on that. The oaks speak to druidic leanings I hold in terms of philosophy and how I live. The bonsai on the cookie of oak is representitive of the value I place in what others would see as waste; turning it into a show piece rather than arising to be moved. A part of me could live with breeze blocks, but Mrs Curle is right, using the birch stump as legs is the winning move. The breeze blocks maybe just too brutalist for this vibe. The whole thing is also unfinished, woefully naive in experience and likely full of errors. But what it isn’t missing is enthusiasm and dedication. Just like anyone starting out.
Shinto / Buddhism play a big role in Japanese garden aesthetics. I cannot say much about Shinto, but I’m no stranger to Buddhist concepts and philosophy. Especially the distraction and the unsettled state of mind that desire brings. It’s an effort to be in a space like this and hold yourself present without zooming forward to the ideas of what “could be”. I was in two minds about the AI mockup precisely for this reason, as it zooms you forward to an idea that doesn’t yet exist. However, I figured this is about communication and not my battles with my inner distraction demons. On that ground it helps you the reader get an idea of the vision. The reason I mention this is that gardens always look nice, but they have a purpose. They are a space for clarity, reflection and to bring about peace.
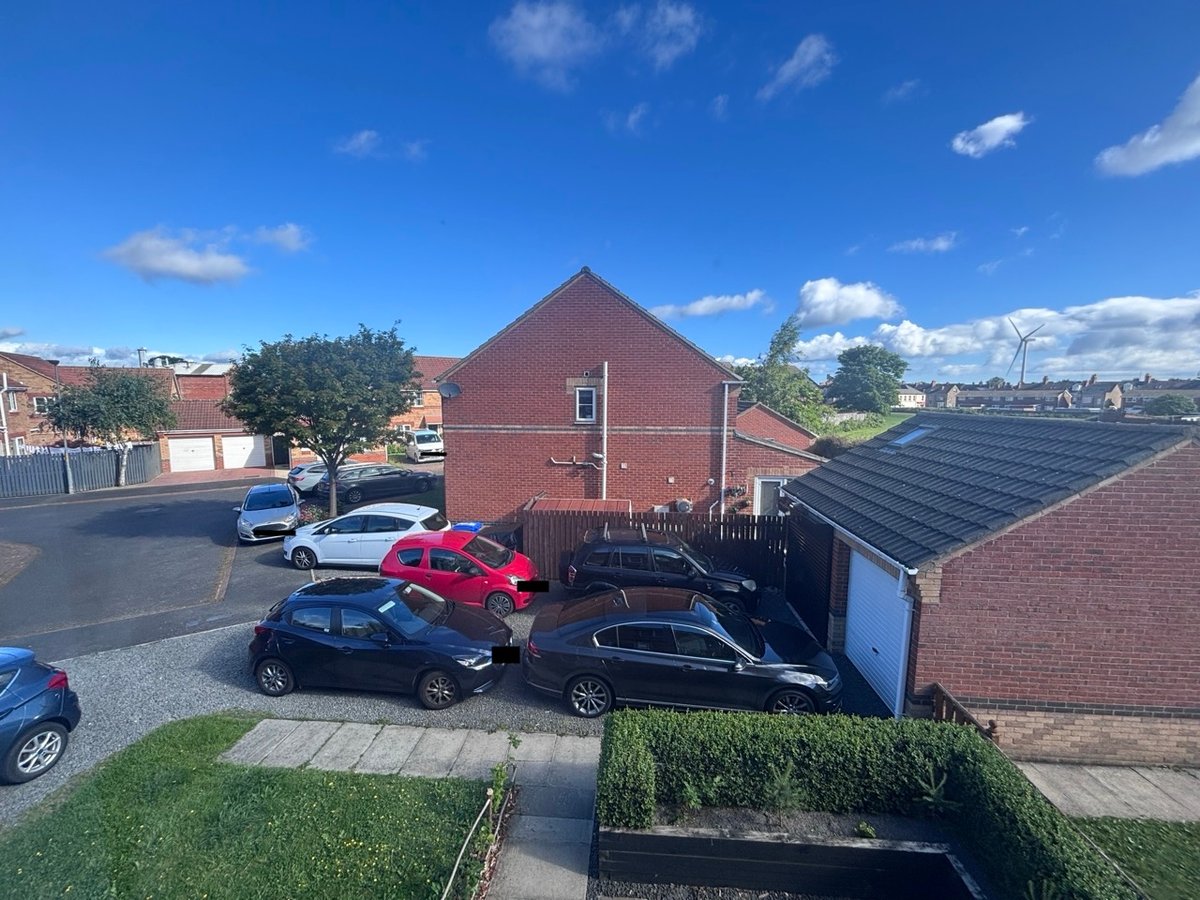
Even though the front of my street looks like this, I am able to be in this space peacefully; to an extent: as we live in very close quarters with our neighbours. But in a way, that’s the thing about community there’s always a conversation to be had, an inquisitive child or two asking surprisingly difficult to answer questions and a delivery driver dropping something off. I love this street.
So yeah, that’s how I’ve applied Japanese garden principles to my garden. If you’re interested in such things yourself, I can recommend Niwaki: Pruning, Training and Shaping Trees the Japanese Way. You don’t need acres of land, thousands of trees or loads of money. You just need patience, time and gratitude for what is present.
-
I saved the trunk, milled it and used it for various things. One of which is a t-square that I used on a daily basis. It was a sycamore. ↩
-
We eventually made up and when they left the street it was good terms. I was quite petulant back then. I had my reasons, but I was not being the best version of myself in that little mini-conflict. ↩
-
With permission of the gaffer. They would have died on a waste pile otherwise. ↩